Planning to Launch a Website But Struggling With iPage Hosting and WordPress?
Then you definitely want to read our quick hands-on setup guide on how to set up WordPress with iPage Hosting.
We’ve developed a very practical and easy-to-follow setup guide.
Do you want to learn how to setup your website within 10 minutes?
Thought so.
With incredible features and customer-friendly designs and interface, iPage is an awesome web hosting company for beginners. On top of that, iPage web hosting offers amazing rates and is perfect when you’re on a small budget.
Our aim is to deliver a practical guide and to show you every step you need to take when:
- Setting up with IPage Hosting
- Setting up WordPress
Refer to the screenshots as a benchmark!
What makes iPage such a good decision when it comes to hosting?
This is what you’ll get:
- $1.99/month Hosting Plan
- One FREE Domain
- 30 Days Refund Policy
- 24/7 American Phone Support
- Live Chat Support
- $450 In Freebies
- Leading Web Hosting Service
Astonishing, isn’t it?
iPage built a name for itself through a combination of high-quality hosting services and very affordable rates. iPage specifically targets people who’re starting their first website or blog and they’ve built their services around that.
Our guide will walk you through the entire setup from A to Z. In just a few clicks, you’ll be ready to start building the website you’ve always dreamed of!
Now Let’s Get to It!
Step 1: Go To iPage
Click the link above and navigate to iPage’s homepage.
Hover your mouse over the red “Sign Up Now” box and continue.

Step 2: Secure A Domain Name
In case you’ve already bought a domain name elsewhere, just tick “use a domain name I already own” and enter the domain name in the field below.
Assuming you haven’t secured a domain name yet, tick “Register a new domain” and enter your domain name. Next, check the availability of the entered domain name.
If the chosen domain is already taken, iPage will provide a list of alternate options, usually with a different extension such as .biz, .online, .co, .org, etc.

For this guide, we used “test30dayblogchallenge.com” as domain name. Once you checked its availability, you’ll be automatically forwarded to the next step.
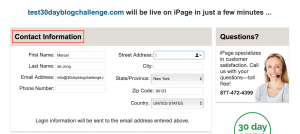
Step 3: Enter Contact Information
After you’ve secured your domain name, you’ll be asked to enter your contact information.
Fill out the form.
You’ll receive a confirmation email on the registered email address later.
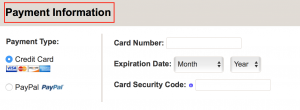
Step 4: Payment Information
After providing your contact information, you need to fill out the payment information section.
You can either choose Credit Card or PayPal.
Step 5: Select Hosting Plan
The first thing to do here is choose a iPage hosting plan.
We recommend going for: “Go Plan – 12 or 24 months”.
Why?
One or two years is quite a long time if you’re just starting out. After one or two years, you can reevaluate the situation again and whether you want to change anything.
It’s tempting to go for 36 months but the truth is, you want to save money in the beginning.
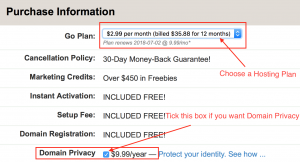
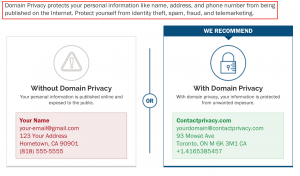
Domain privacy is generally recommended to purchase. It’s only $9.99/year and it will protect your personal information.
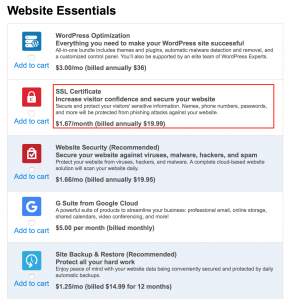
Step 6: Website Essentials (Add-ons)
It was tempting to select a cheap web hosting plan for 36 months, right?
When you read iPage Website Essentials, you’re probably just as tempted to select every single add-on as well.
Don’t.
This doesn’t mean you should never buy these add-ons, but for now, it’s best to deselect all and save some hard cash.
The only add-on you might want to consider at this point is a SSL Certificate. It’s available at a decent price, $1.67/month.
The biggest advantage for this particular add-on?
Google likes websites with SSL Certificates.
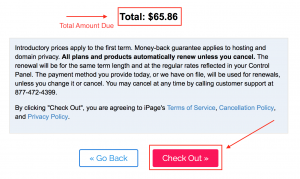
Step 7: Take It Or Leave It
This is the final step in order to finalise your iPage hosting plan.
Total amount due will be displayed.
Correct? Click on “Check Out” and…
..You’re done!!
One More Bridge To Cross
Now you’ve successfully completed the first phase, it’s time for the final phase.
Login to the registered email address and open iPage’s account confirmation email. You’ll need the information provided to complete the final step.
Here’s All You Need to Do:
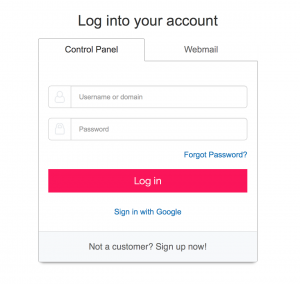
Step 1: Login to iPage Control Panel
Click the link above and login with your username or domain and password.
Click on the red “Log in” box.
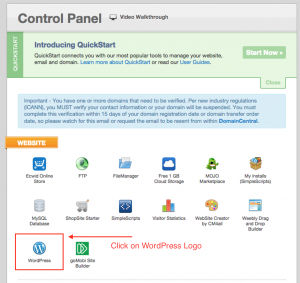
Step 2: Install WordPress
When you’re logged into iPage Control Panel, find the “Website” section and click on the WordPress logo.
You’ll now be redirected to WordPress’s one-click installation page.
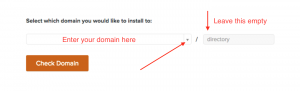
Step 3: Select Domain
It’s now time to setup WordPress on your domain. Enter your earlier chosen domain name in the first empty box. Leave the “directory” box empty.
Step 4: One More Click!
Once you’ve selected your domain, there’s just one more thing to do:
Install WordPress Now!
Tick the terms and conditions box and click “Install Now”
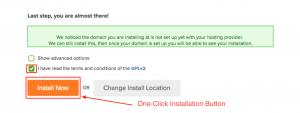
The installation process will take a few minutes and then…
…. BOOOOM! You’re there.
That’s all you have to do.
Time To Roll Up Your Sleeves!
It’s time to get this thing rolling…
Let’s have a quick rewind:
In order to complete a successful setup of a new WordPress blog with iPage hosting, make sure to simply follow this guide, rest assured you’ll be be ready to go in 10 minutes.
We want YOU to take ACTION
That’s why we provided you this easy walk through guide and help you launch a brand new WordPress website or blog today! Now, get out there and get blogging!
Wait! We have a final tip for you…
Within iPage’s dashboard, you can choose between paid iPage WordPress themes or free themes in your WordPress dashboard.
When you have no experience in creating WordPress websites, we recommend going for a free theme first.
Do you have any questions or remarks about setting up WordPress with iPage hosting?
Don’t hesitate to contact us!
We are here for YOU!